Advent of 2021, Day 2 – Installing Apache Spark
Want to share your content on R-bloggers? click here if you have a blog, or here if you don't.
Series of Apache Spark posts:
- Dec 01: What is Apache Spark
Today, we will look into installing Apache Spark. Spark is cross-platform software and therefore, we will look into installing it on both Windows and MacOS.
Windows
Installing Apache Spark on Windows computer will require preinstalled Java JDK (Java Development Kit). Java 8 or later version, with current version 17. On Oracle website, download the Java and install it on your system. Easiest way is to download the x64 MSI Installer. Install the file and follow the instructions. Installer will create a folder like “C:\Program Files\Java\jdk-17.0.1”.
After the installation is completed, proceed with installation of Apache Spark. Download Spark from the Apache Spark website. Select the Spark release 3.2.0 (Oct 13 2021) with package type: Pre-built for Apache Hadoop 3.3 and later.
Click on the file “spark-3.2.0-bin-hadoop3.2.tgz” and it will redirect you to download site.
Create a folder – I am creating C:\SparkApp and unzipping all the content of the tgz file into this folder. The final structure of the folder should be: C:\SparkApp\spark-3.2.0-bin-hadoop3.2.
Furthermore, we need to set the environment variables. You will find them in Control Panel -> System -> About -> Advanced System Settings and go to Advanced Tab and click Environment variables. Add three User variables: SPARK_HOME, HADOOP_HOME, JAVA_HOME
with following values:
SPARK_HOME C:\SparkApp\spark-3.2.0-bin-hadoop3.2.\binHADOOP_HOME C:\SparkApp\spark-3.2.0-bin-hadoop3.2.\binJAVA_HOME C:\Program Files\Java\jdk-17.0.1\bin
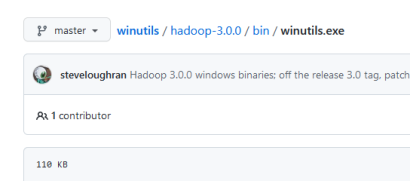
The last part is the download of the Winutil.exe file and paste it to the bin folder of your Spark binary; into: C:\SparkApp\spark-3.2.0-bin-hadoop3.2\bin.
Winutil can be found on Github and I am downloading for Hadoop-3.0.0.
After copying the file, open Command line in your windows machinee. Navigate to C:\SparkApp\spark-3.2.0-bin-hadoop3.2\bin and run command spark-shell. This CLI utlity comes with this distribution of Apache spark. You are ready to start using Spark.
MacOS
With installing Apache Spark on MacOS, most of the installation can be done using CLI.
Presumably, you already have installed BREW. You can always update the brew to latest version:
brew upgrade && brew update
After this is finished, run the java installation
brew install java8
brew install java
Installing xcode is the next step:
xcode-select --install
After this is finished, install scala:
brew install scala

And the final step is to install Spark by typing the following command in CLI:
brew install apache-spark
And run:
brew link --overwrite apache-spark
Finally, to execute the Spark shell, command is the same in Windows as it is in MacOS. Run the following command to start spark shell:
Spark-shell
Spark is up and running on OpenJDK VM with Java 11.
Compete set of code, documents, notebooks, and all of the materials will be available at the Github repository: https://github.com/tomaztk/Spark-for-data-engineers
Tomorrow we will look into the Spark CLI and WEB UI and get to know the environment.
Happy Spark Advent of 2021! 
R-bloggers.com offers daily e-mail updates about R news and tutorials about learning R and many other topics. Click here if you're looking to post or find an R/data-science job.
Want to share your content on R-bloggers? click here if you have a blog, or here if you don't.


