Blog with R Markdown and tumblr: Part I
Want to share your content on R-bloggers? click here if you have a blog, or here if you don't.
I finally got a chance this weekend to settle on a way to include R Markdown into my blogging process. I needed to do this as my subsequent postings will involve more code chunks regarding Rook deployment and examples, and R Markdown formats and highlights code chunks like a boss! If you want to incorporate R code, math equations, and R plots like this example, follow these steps to create a tumblr blog and get your theme ready to write your first post.
Step 1: Create a tumblr Blog
Easy enough, just got to http://www.tumblr.com, sign up, login, and follow the steps to name your first blog. There will be other interstitial steps like asking how old you are, asking who you want to follow, etc. The important thing is to name your new blog and get to your Dashboard. It will look something like this:

tumblr has done a great job of creating a simple visual interface, but sometimes even the interface can break down and leave the user confused about where they are and what they need to do next. For instance, notice that in the red circle and just under the word Dashboard is a small triangle as if it’s pointing to the word. The light-blue on dark-blue color scheme hides that a bit, and maybe you can change that? I don’t know, but that’s the indicator that you’re on your tumblr Dashboard screen.
Step 2: Click on the Name of Your Blog
Just to the right of the word Dashboard in the screen above, you should see the word Untitled. That’s the name of the blog in this example. Click on it and you should see:

Now that little triangle thingy has moved underneath the word Untitled. That’s where we want to be.
Step 3: Click on “Customize theme”
Now, before you see the following screen, you may see a screen that tells you to verify your email address. Go do that and then get back to your blog page by following Step 2 above. Done? Okay, here’s what you’ll see:

Step 4: Click on “Edit HTML”
You’re now presented with a screen with two columns: on the left is an editor with the html code of your theme, and on the right is a preview of what your blog looks like based on the contents of the editor.

Step 5: Pay Attention!
Because the next steps are really important.
Step 6: Delete Everything in the Editor
I typically do this by making sure my mouse focus is in the editor, typing Ctrl-a (hold down the “Ctrl” key and click “a” once), and then typing the Delete key. Make sure your editor window now looks like this:

Step 7: Copy the R Markdown tumblr Theme
In a new browser tab or window, surf to
https://raw.github.com/jeffreyhorner/RFMExamples/master/R-Markdown-tumblr-theme.html
and copy the entire file by typing Ctrl-a and then Ctrl-c (or your computer may have a variant of this, for instance on Macs you would use Command-a and then Command-c, at least I think that’s right).
Step 8: Paste it into the Editor and Click “Update preview”
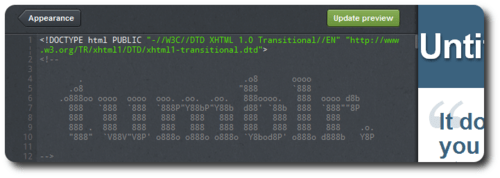
Now switch back to the browser tab or window that contains the tumblr editor and paste the contents into the editor, then click the green Update preview button located at the top of the screen. It should look something like this:

Step 9: Click the “Save” Button, Then the “Appearance” Button, Then the “Close” Button
Hurray! You just updated your blog theme! Now you’re well on your way to creating your first blog post with R Markdown. I’ll cover that in Part II tomorrow.
R-bloggers.com offers daily e-mail updates about R news and tutorials about learning R and many other topics. Click here if you're looking to post or find an R/data-science job.
Want to share your content on R-bloggers? click here if you have a blog, or here if you don't.
